
.jpg)
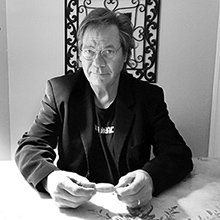
Like many fans of instant imagery and one whose career is inextricably bound to Polaroid film, I was greatly anticipating the release of Impossible Project’s first film release, PX 100. I purchased my first two packs last week and have been experimenting with different techniques and uses. Some of my earliest creative work was done with Polaroid SX-70 film. This was the first generation material which preceded Time Zero in 1980. I first began to work with it in 1974, doing surface manipulations on the very pliable film. In 1976 I learned of a technique for stripping the negative away from the positive, several hours after exposure. With the negative removed, I could remove portions of the image on the transparent positive and replace them with elements of collage or acrylic paint. In 1978 I actually began working for Polaroid testing film and cameras and one of the first films I tested was SX-70 Time Zero film. I am accustomed to prototype film and also experienced at just about every manipulation technique available, so I was looking forward to running this film through the paces.
Having been to the press conference to announce the film and studying the information provided on the Impossible website I knew the film was quite temperature sensitive, touch sensitive and that the opacification layer needed some help. After each exposure I quickly put the piece of film in my pocket to protect it from the bright outside light. It was a warm morning for Western Massachusetts, close to 65º at 8:00 a.m. I photographed a tree and an arrangement on my front porch. I still had one sheet of Polaroid’s Artistic TZ in my camera from nearly two years ago, I had tested that for Polaroid before they closed the Waltham plant. It still looked reasonably good and it showed my rollers were clean.
My first PX100 shot of the tree was very flat and pale compared to the Artistic TZ image. It also exhibited a horizontal banding approximately a half inch apart. Since the TZ image did not exhibit these marks I was concerned and trying to figure out the cause. It is possible that there are variations in the side rails that determine the chemical gap for the film. My guess is that in cooler temperatures these variances are accentuated and their effect was a permanent density change (darker) in those bands. Later shots indoors did not exhibit this artifact nearly as much and in some exposures it was not evident at all. All in all, I was not terribly pleased with any of the images made outdoors and only moderately pleased with images made inside a sun porch. Later, I used my SX-70 to copy some large prints and the film’s performance improved markedly. It was still quite sensitive to exposure variation, a 1/3 stop change in exposure looked more like 2/3. The image density was greatly improved and as I mentioned previously the banding I saw outside nearly disappeared. I scanned some of the images before I manipulated them, taking them apart in some cases.
The result of my experiments is presented here with additional commentary where needed.

This early morning image shot at a cool but not cold temperature. It is lacking contrast and density and shows a banding seen in all of the outdoor images.


Once I moved inside to my studio upstairs the temperature increased to about 75º. The image quality increased noticeably and the banding seemed to all but disappear. This was a different pack of film and that alone could be the reason. Minor banding did appear in some images. More annoying was an increasing amount of incomplete coverage as the reagent in the pod was not sufficient to spread all the way to the top middle of the image.
Another copy image, photographed with tungsten light, camera on tripod. Beautiful tones in this image, perhaps the best out of the two packs. The rest of the pack exhibited the same and growing incomplete coverage. Along the right side of the image there is also some artifacting coming from the rail, perhaps some un-eveness on the rail.
To take the image apart, I first waited approximately one hour to allow the image to cure somewhat. Earlier in the day I peeled on apart only minutes after exposure and half stayed with the positive and half went with the negative, a characteristic shared with Time Zero and Artistic TZ. To peel an image you turn it over to the black backing and using an Exacto knife I cut around the four edges of the black, being careful not to cut all of the way through the white border on the other side. This is a skill I developed cutting thousands of SX-70s apart in the 1970’s. When I peeled this one, the dyes all stayed with the negative. The positive retained a sticky clear residue. I attempted to peel off the dyes from the negative and although they would come, they stretched and also exhibited a stickiness that made it difficult to control the dyes. I removed and split parts of the image and rejoined it with the positive, which it stuck to quite well. The black gap at the top of both images is the incomplete coverage I referenced earlier.
Can’t wait for Impossible’s color film? Paint your color in. After stripping the images the way I did above I wanted to see what would happen if I introduced hot water to the process. The positive’s sticky material easily rinsed off and while the negative held onto the image it eventually separated from the negative base. I floated it free in a small tray of water, much like you would do with an emulsion lift with Polacolor or Fuji peel apart film. These dyes (perhaps not the right term) were quite thin and somewhat difficult to control. My goal was to preserve the birds and shape the rest of the image. I coated the image and the inside of the positive with archival glue and picked up the image by placing the image frame over the image and rubbing the front of the positive to secure the dyes. When the glue dried, I first backpainted the image with white paint to restore its opacity when viewed from the front. With that dry I added blue as a background. Now this was very crude compared to the images I constructed in the 1970s, but I just wanted to see if it could work and the answer is yes, it can. See my earlier post on SX-70, Where it All Began.
Having been to the press conference to announce the film and studying the information provided on the Impossible website I knew the film was quite temperature sensitive, touch sensitive and that the opacification layer needed some help. After each exposure I quickly put the piece of film in my pocket to protect it from the bright outside light. It was a warm morning for Western Massachusetts, close to 65º at 8:00 a.m. I photographed a tree and an arrangement on my front porch. I still had one sheet of Polaroid’s Artistic TZ in my camera from nearly two years ago, I had tested that for Polaroid before they closed the Waltham plant. It still looked reasonably good and it showed my rollers were clean.
My first PX100 shot of the tree was very flat and pale compared to the Artistic TZ image. It also exhibited a horizontal banding approximately a half inch apart. Since the TZ image did not exhibit these marks I was concerned and trying to figure out the cause. It is possible that there are variations in the side rails that determine the chemical gap for the film. My guess is that in cooler temperatures these variances are accentuated and their effect was a permanent density change (darker) in those bands. Later shots indoors did not exhibit this artifact nearly as much and in some exposures it was not evident at all. All in all, I was not terribly pleased with any of the images made outdoors and only moderately pleased with images made inside a sun porch. Later, I used my SX-70 to copy some large prints and the film’s performance improved markedly. It was still quite sensitive to exposure variation, a 1/3 stop change in exposure looked more like 2/3. The image density was greatly improved and as I mentioned previously the banding I saw outside nearly disappeared. I scanned some of the images before I manipulated them, taking them apart in some cases.
The result of my experiments is presented here with additional commentary where needed.
PX 100 Shot outdoors, temp 65º F
This early morning image shot at a cool but not cold temperature. It is lacking contrast and density and shows a banding seen in all of the outdoor images.
Comparison of un-manipulated exposure and similar image cut, stripped and put back together.
Photographed inside porch, backlit.
Same inside porch, also strongly backlit.
On camera flash, surface manipulated.
Copy Image of digital photomontage.
Once I moved inside to my studio upstairs the temperature increased to about 75º. The image quality increased noticeably and the banding seemed to all but disappear. This was a different pack of film and that alone could be the reason. Minor banding did appear in some images. More annoying was an increasing amount of incomplete coverage as the reagent in the pod was not sufficient to spread all the way to the top middle of the image.
Copy Image of digital photomontage.
Another copy image, photographed with tungsten light, camera on tripod. Beautiful tones in this image, perhaps the best out of the two packs. The rest of the pack exhibited the same and growing incomplete coverage. Along the right side of the image there is also some artifacting coming from the rail, perhaps some un-eveness on the rail.
Comparison of un-manipulated copy image and a similar image cut open, negative peeled away from positive and placed back together.
To take the image apart, I first waited approximately one hour to allow the image to cure somewhat. Earlier in the day I peeled on apart only minutes after exposure and half stayed with the positive and half went with the negative, a characteristic shared with Time Zero and Artistic TZ. To peel an image you turn it over to the black backing and using an Exacto knife I cut around the four edges of the black, being careful not to cut all of the way through the white border on the other side. This is a skill I developed cutting thousands of SX-70s apart in the 1970’s. When I peeled this one, the dyes all stayed with the negative. The positive retained a sticky clear residue. I attempted to peel off the dyes from the negative and although they would come, they stretched and also exhibited a stickiness that made it difficult to control the dyes. I removed and split parts of the image and rejoined it with the positive, which it stuck to quite well. The black gap at the top of both images is the incomplete coverage I referenced earlier.
PX 100 Image Lift and re-inserted, glued and backpainted.
Can’t wait for Impossible’s color film? Paint your color in. After stripping the images the way I did above I wanted to see what would happen if I introduced hot water to the process. The positive’s sticky material easily rinsed off and while the negative held onto the image it eventually separated from the negative base. I floated it free in a small tray of water, much like you would do with an emulsion lift with Polacolor or Fuji peel apart film. These dyes (perhaps not the right term) were quite thin and somewhat difficult to control. My goal was to preserve the birds and shape the rest of the image. I coated the image and the inside of the positive with archival glue and picked up the image by placing the image frame over the image and rubbing the front of the positive to secure the dyes. When the glue dried, I first backpainted the image with white paint to restore its opacity when viewed from the front. With that dry I added blue as a background. Now this was very crude compared to the images I constructed in the 1970s, but I just wanted to see if it could work and the answer is yes, it can. See my earlier post on SX-70, Where it All Began.


.jpg)


